foundry wax

small stuff 002

Continuing with the “small is beautiful” theme, here’s something I cut today, along with the tiny bit I used to do it. The material is machinable wax, and it’s for the guy across the hall from my shop, who is expanding and developing his foundry skills. This will be used to make a pattern for casting the parts in aluminum. He provided me with a 2D drawing, which I then converted into 3D geometry. This is my first real foray into the world of engraving, and I’m looking forward to doing more of it.

small bit, great results

On a recent sign project with some smallish letters I cut this with a 1/16″ (1.6MM) bit and it turned out pretty nicely:

rockstar bits

If you’ve never tried to cut aluminum with a router, you might not know that it can be pretty difficult to keep little “tongues” of metal like you see in the above photo from bending and moving around from the force of the spinning bit.

I cut matching pieces out of acrylic that exactly fit in the cutouts above, but I forgot to take pictures of them.

The material is .050″ thick aluminum, provided by the guy who was assembling, finishing, and installing the sign. It comes with the white paint expertly applied at the factory, and it’s easy to just scuff sand it a little bit and spray whatever paint you want over it. Considering how hard it can be to apply a coat of paint on bare aluminum that will resist peeling, it seems like a pretty smart move. It cuts just as well as shiny bare aluminum.

The Tree

tree installed 001E

This was a project I did a couple of years ago and just never got around to documenting. It was for a woman who was expecting twins and was decorating the nursery, although when she saw the result she decided she wanted it installed in a much more visible location at the top of the front stairs.

When she first contacted me about the project I was a little incredulous and suggested that she send me some kind of sketch to show what she wanted. When she sent me a picture of large sheets of paper taped to the wall with an actual size drawing on them I realized she was quite serious. She’s pretty knowledgeable about the digital design process and was able to scan her life sized drawing and provide me with a vector file of the outline in DXF format.

She originally suggested cutting it out of plywood, and as I was calculating the cost of the very high quality plywood that would be required and the large amount of it that would be cut away and discarded, plus the issues with finishing the edges I realized that solid wood was a viable alternative. The whole thing is made of red oak and joined with jigsaw puzzle joints. which I added to the original outline.

fully assembled 006-E

To do this requires cutting on both sides of the board. This kind of two sided machining is pretty demanding and requires exact alignment of both the machine and workpiece. The whole thing would obviously have been very difficult to transport if it was all glued together, and it would also have been very difficult to get it through the doorways to it’s intended location, so I made it in four sections with joints like the one in the picture below.

aluminum pieces-E

These plates were cut from high strength 6061 aluminum, and the smaller ones with the screw threads in them were glued in place with a slow setting high strength epoxy.

It’s always a treat when I get to machine solid wood, and even more satisfying when I get to make someone’s wild idea into something real!


boat electrical box 004

David Heiserrer, of Jiggernaut  fame is renovating a sailboat, and part of the renovation involves some new  electrical doodads, so he emailed me a file and dropped off the electrical box you see in the picture above, except it had none of those holes in it.

How to mount such a thing on the table for cutting? The four mounting holes on the back with threaded inserts looked like a good bet. It turned out to be a standard polycarbonate enclosure from Hoffman, so a datasheet showing the spacing of the mounting hole spacing was pretty easy to turn up.

boat electrical box 001

It was the perfect opportunity to do something useful with an oil-stained piece of half inch MDF that was sitting around. I quickly programmed and drilled the rather oddly spaced hole pattern and mounted the board to the back of the enclosure using flathead screws, then mounted the board to the machine.

boat electrical box 003


Experience has shown that an unsupported piece of plastic like the door (where I needed to do the cutting) will vibrate like a drumhead, so I also cut another piece of half inch MDF to fit inside the door to back it up and attached it with double sided tape.

David’s original design had round holes for all the components, but he brought samples. A little quick googling turned up datasheets for all of them, so I fine tuned the dimensions and added anti rotation features.

boat electrical box 005


David now has a very high quality electrical box with parts that will remain neatly aligned. It doesn’t matter whether I have to think inside the box, outside the box, or both, my focus is always on creative solutions to my customers problems!

Robocut has moved!

It was a good run in Delano, but Robocut is now up and running in Minneapolis, occupying a small space in this large and rather distinctive building:

canada--element39-enhanced

It’s quite a unique building, so I did a little digging and came up with this old photo:

media

It was built as a Canada Dry bottling plant and designed by Walter M. Cory, who is alleged to have said “factories can be beautiful”. There were quite a few Canada Dry bottling plants built across the nation in this style known as “Streamline Moderne”, Only one has been actively preserved, in Silver Spring, Maryland. The rest are in various stages of decay and “remuddling”.

Walter M. Cory is perhaps better known for designing the Starrett-Lehigh Building, which occupies a square block in Manhattan:

starrett-lehigh

One of the amenities of the new Robocut location is that it’s right on the dedicated bike path called The Greenway, and another is the park across the street with this unique sculpture in it:

Brackett rocket-smaller

I look forward to continuing to serve the greater Twin Cities  area and beyond, with much quicker and easier access for my customers in Minneapolis and Saint Paul.

SKOL PER FISKEN

skol 001

In the unlikely event you were to guess that the item on the router on the above photo is a board from a fishing dock you would be completely right. The chronically hilarious Arik Nordby, the warped genius behind “gotcha boxes” (chronicled here and here) sent me a file with the charming Akvavit-infused font you see above.

The translation he gave me was a little hazy and I may be missing some nuance, but I’m pretty sure “SKOL” equates to  “a toast”, “bottoms up”, or “ein prosit”, and I’m reasonably certain “FISKEN” means “fishing”, so you get the gist of it. I can’t definitively say whether it means “let’s get blind drunk and pass out on the bottom of the fishing boat” or not.

Astute observers may wonder whether the duct tape in the image above is all that is holding it in place on the machine. Thankfully, it’s not. What it’s doing is sealing the edges of the plank, so the air being drawn downward through the piece of MDF beneath it  can create a vacuum, which is what’s really holding the board in place, and pulling it down flatter than it is ordinarily.

Here’s one more picture:

skol 002 copy

If a wall mount bottle opener which says “IT’S ON, Motherfuckers” would make your life complete, by all means mosey over to Arik’s e-store at 30watt.com.

prohibitionwallbottleopener

spindle bearings

Spindle bearings. Every machine with a rotating cutter (such as a CNC router) has them. While they are not nearly as impressive from a technology standpoint as something like a microprocessor or an FPGA, one still has to stand in awe of the manufacturing process used to make these things. The steel has to be utterly, totally pure, and the surfaces are ground to a mirror finish, and to a roundness of a few microns. After doing this, the manufacturer then picks through them, looking for pairs that are exactly that same couple of microns off, and matches them up in pairs. Here’s a picture of the ones I just installed:

bearings 001-enhanced

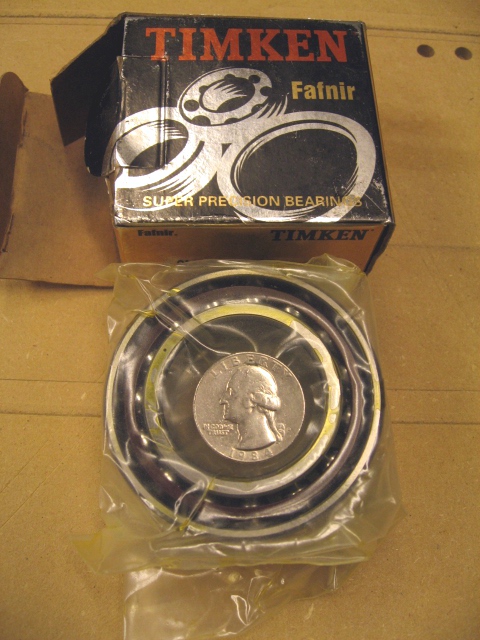
Because they were old stock in a scruffy looking box I was able to buy them on ebay for slightly under $200. If you bought new stock in shiny pretty boxes they would set you back about $350. They are the hardest working bearing on the machine. When they are in top condition miracles are possible, kind of like a prima-donna ballerina or a tenor in Italian opera.

bearings 002-enhanced

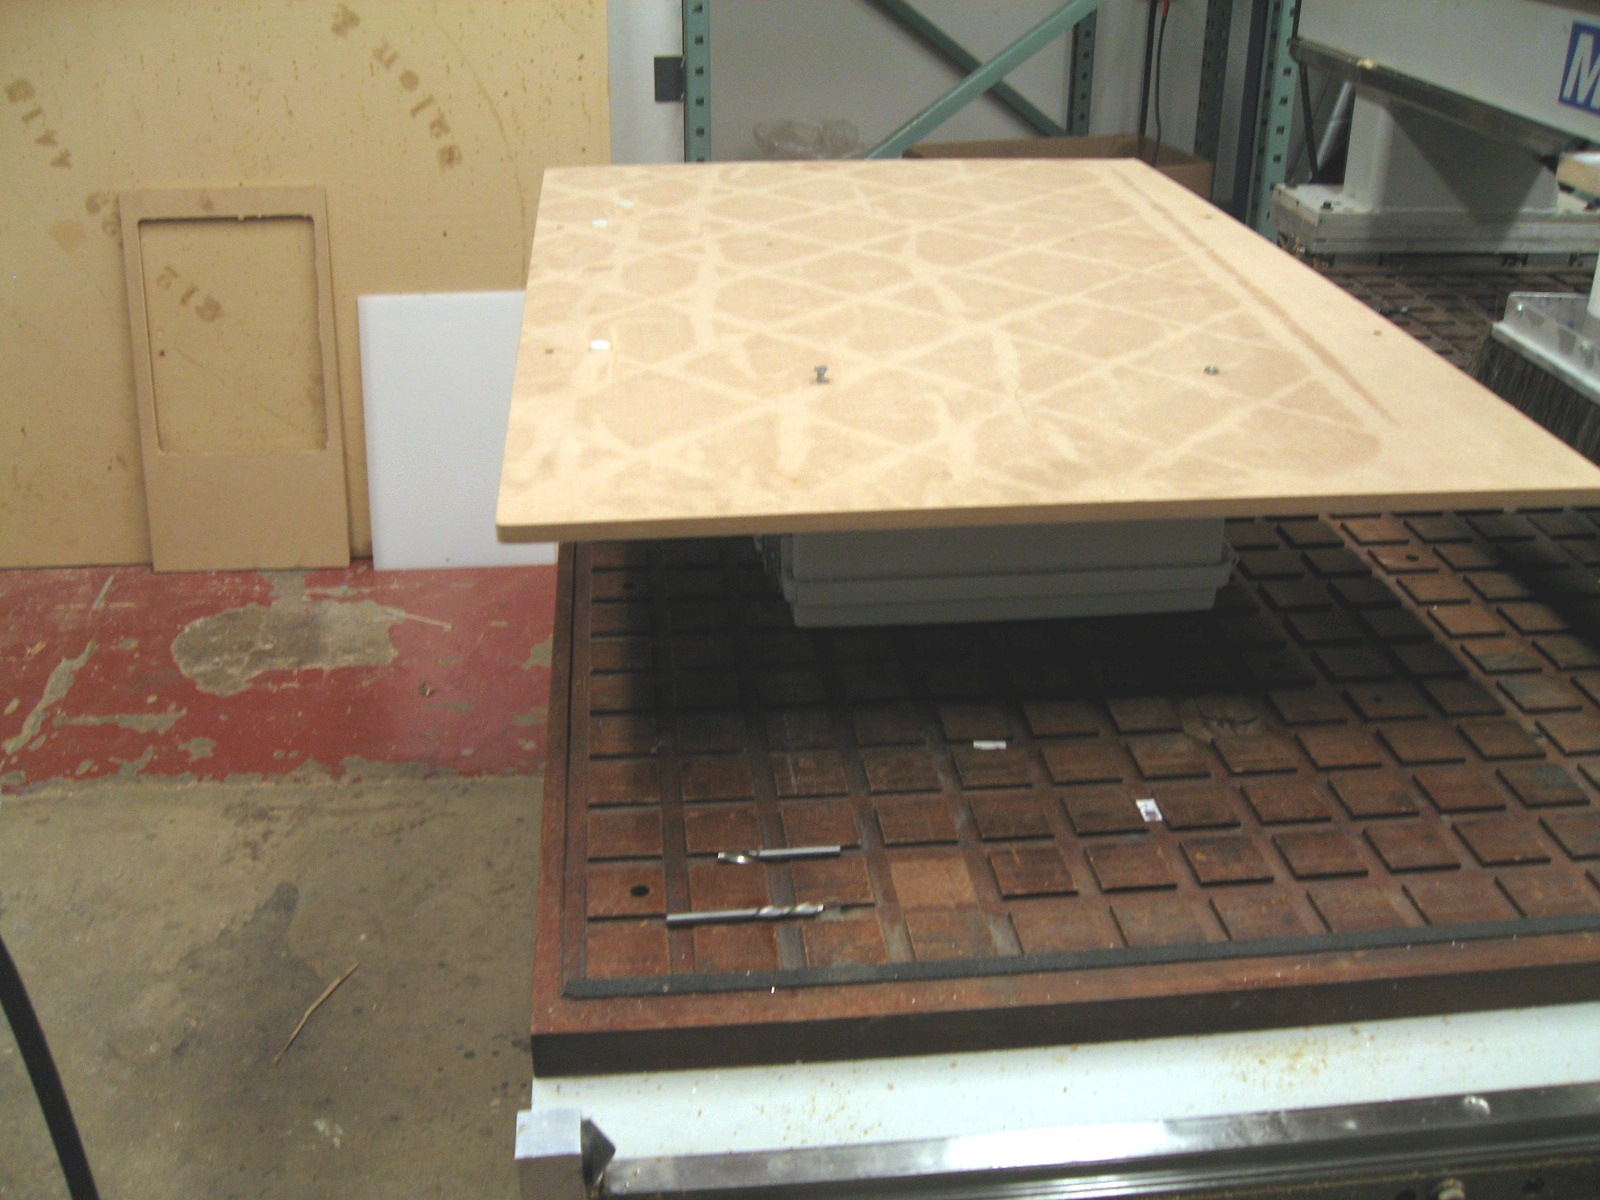
As you can see from the picture above, they live in a bad neighborhood. The red circle is around the “bit” (it slightly resembles a drill bit) which gets shoved through the material at speeds up to 10 inches per second while spinning at 15,000 rpm. My finger is pointing to the housing where the bearings live. Hour after hour, day after day, year after year that spinning bit rudely transmits vibrations, sideways loads, and belches out clouds of chips and dust, a microscopic fraction of which finds it’s way into the bearings despite the best efforts to keep it out.

As these miraculous bearings go into decline, however, they are the exact opposite of an operatic singer. They make more and more noise. Everybody who owns a CNC router lives in dread of a dying spindle. You cope. You slow down the speeds a little, and look for those particular speeds where the resonance works in your favor and try to do your cutting at those speeds. But you can only cope for so long, and eventually you just have to bite the bullet.

You can either pay in time or money to get them installed. Hiring the job done costs an amount in the low four figures, so I opted to run the gauntlet of finding the exactly right $30 an ounce grease, building the special tools necessary, and learning how to carefully run the new bearings in while monitoring temperature. A plastic bag can become a temporary clean room.

Now I get to enjoy the quiet “whir” of my new bearings! It’s a beautiful sound.


Jiggernaut.

The Jiggernaut was a project I recently completed for local design think-tank Mixed Media Engineering. They first came to my attention when I read a story about the 2011 Red Bull Creation Contest, or “buildathon”, or whatever it’s called. They competed as “1.2 Jigawatts”, and built this thing:

It’s sort of a big hamster wheel that receives text messages and prints them out on the pavement while somebody is walking inside it. It stole the show and won first prize. Needless to say, when I found out these guys were from Minneapolis I had to look them up, congratulate them on their win.

Then last spring I noticed they had an interesting Kickstarter project going called the  Jiggernaut, a bicycle frame building tool which looks like this:

They needed 100 sets of parts, so I ordered up a unit of “door grade” 3/4″ MDF. Door grade is a premium quality MDF which is stronger, cuts cleaner, and causes less wear on the tools used to cut it. A unit is a big stack (in this case 35 sheets) which looks like this:

Since Each Jiggernaut requires 26 parts, those sheets of MDF quickly turned into a lot of pieces:

And a lot of dust and chips. The six bags in the above photo represent 2 days of cutting. It’s great to have a serious industrial grade dust collector!

The tall guy on the right with “torit & day” in white letters is my hero on jobs like this.

This was a fun job. It’s great to think about all those folks who contributed to the project on Kickstarter brazing up their own custom bike frames!

I cut the letters, Sean did the rest

Forgot to take pictures of these sign letters while they were being cut, but here they are assembled to the steel backing. The material was 3/4″ Extira, a variety of MDF (medium density fiberboard) with outstanding weather resistance, which is also used for exterior architectural trim and moldings.

The picture above shows the twin of the sign in the first picture in place and mounted to the building. The design, assembly, and mounting were done by the very capable Sean Doyle.  He also cut the delicate tree design on the corner of the building, which is visible above his left shoulder by hand with an oxyacetylene torch. The rest of us can only dream  of having such well developed fine motor skills.